|
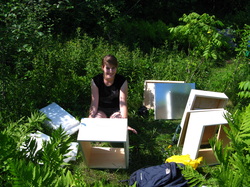
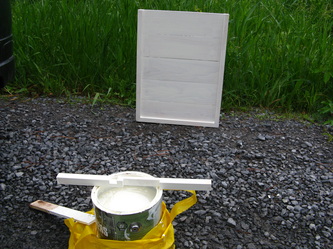
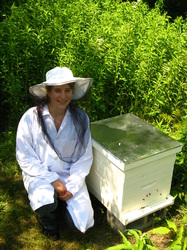
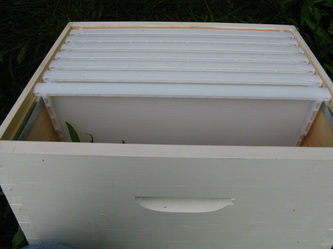
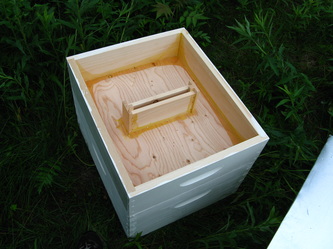
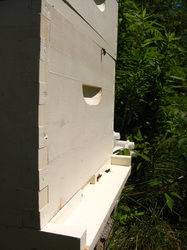
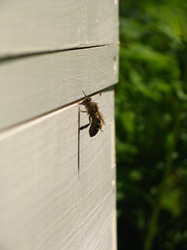
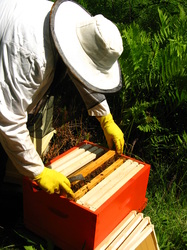
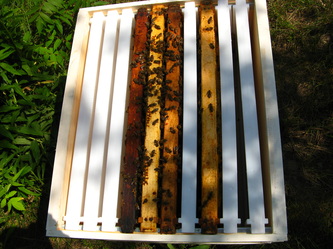
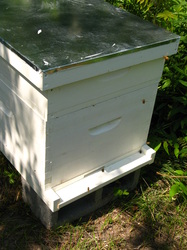
For the past few months, I've been preparing to get a beehive. I got the idea suddenly when I was on a train to Toronto: why don't I start a beehive at the cottage? I had already heard a lot about colony collapse disorder, and the mystery of why bees were dying off. On my self sufficiency kick this summer, I thought that getting some honey bees would be a good way to help the population, and make me a little honey on the side. Plus, I think anyone who has read even a little bit about honey bees finds them facinating, with their social structure and dancing. I had a hard time figuring out how to get started, but I read a few books about beekeeping for absolute beginners and tried to talk to a lot of people about it. Turns out, I had two friends and a coworker who also had bees. I realized that instead of starting one at the cottage, where I would be completely isolated and not have anyone to ask for help, I could join the McGill Community Apiary. There are communal supplies (like the mesh hats, smoker, and tools), and it's great to have a community of people to answer my questions (like..."uhh...so what do I do with these bees when I get them?"). My first step was to order the pieces of the hive. I knew I needed a series of boxes and other various wooden things, but it was Branislav, who founded the McGill Apiary a few years ago, who gave me a list of the essential parts that I needed for a Langstroth hive (the most common type). About a few weeks ago, my materials arrived from Propolis-Etc, a beekeeping supplies company in Quebec. You can buy parts of the hive already assembled and painted, but I chose to save some money by D.I.mYself. My hive costs about $170 (taxes included) for the bottom board, two medium supers (where the bees live and make honey), a feeder for the fall/spring, 20 plastic frames for the bees to make combs over (10 per super), an inner cover, an entrance reducer, and an outer cover. 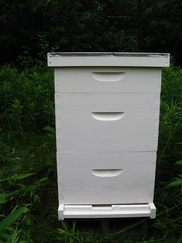 Hive all assembled and painted. I'm not very handy, so I enlisted the help of a new friend to help put it together and paint. From what I've read, it's not a huge amount of work to maintain a beehive, but they do need to be checked on every 2 weeks or so, and preparations need to be made in the fall and spring. Therefore, it's helpful to have 2 people share the work of a hive and split the honey at the end (especially when that friend lives within 5 minutes from the hive, instead of 45 minutes like myself). Next part: the bees! I had never even been near a beehive in real life until the day I put mine together. I started second guessing myeslf when I showed up the apiary and realized that I was 2 feet away from someone else's buzzing, very active hive with hundreds of scary bees. Would my hammering and talking anger them, forcing them to turn on me in a massive swarm? Nope. I could sit off to the side of a hive and watch them go in and out without them really caring. They do sting, but it seems like it's most likely when you're standing in their flight path...so stay away from the front entrance! Once I realized that the bees didn't really care that I was there, I felt more comfortable about what I had just gotten myself into. Over the weekend, Branislav took 4 frames of someone else's hive and put them in my own. The workers were happy to stay in their shiney new hive for a few days without a queen. Then, a queen and a few drones in a little plastic cage were put into my new hive. There is a bunch of sugar plugging the exit of the cage, so within a few days, they eat their way out of the container. By that time, the workers have accepted their new queen. Within a few days, you have to check to make sure the queen is still there (she's marked with a little white dot, which makes it a heck of a lot easier to distinguish a slightly larger bee from hundreds of others). I checked on my hive on Monday, and am pleased to report that it seems to be going well! I didn't realize that I had to paint the plastic frames with wax because usually the bees won't start putting eggs or honey there without that foundation. So my project today is to melt some leftover beeswax from the apiary and paint it onto my plastic frames. I had kind of gotten into beekeeping because it sounded interesting and I thought it would be good to help out the overall honey bee population. I did not expect the feeling of wonder and love when I sat next to my complete beehive and watched the worker bees dance their heart out at the entrance of the hive. And if you don't think bees are cool yet, watch this video:
1 Comment
I ate the last can of tuna that I will buy in a long time. I don't really like fish too much to begin with, but I tend to buy canned tuna and eat it occasionally, especially when there isn't much else left in my fridge.
I've heard recently that the Bluefin Tuna is labelled critically endangered by the IUCN. The WWF estimates that the species is in danger of complete collapse. I thought at first that this was used in canned tuna, but I learned that actually, 40% of bluefin is used for sushi in Japan. I looked on the website of the type of tuna I bought, Starkist, but nothing on the label or the website indicated what kind of tuna it was, where it was from, or how it was caught. Whether eating fish is considered sustainable or not really depends on these factors. The Monteray Aquarium Seafood Watch puts out a great guide to what should be avoided, and what types of fish/fishing practices are okay to eat. They also have one about sustainable sushi, for you sushi lovers! Upon further inspection, I found out that most canned tuna in the US/Canada isn't Bluefin Tuna (phew! I haven't been eating an almost-endangered species for years). It comes from Albacore Tuna, which is more plentiful. However, there are many different ways it can be caught, and some areas are worse than others to fish from. The best choice is to get albacore that has been fished from the US/Canada Pacific by pole-and-line. Since I can't find out about where the Starkist tuna that I had for supper came from, I guess I'll just have to assume that I should avoid it. Long-line tuna caught is the worst (compared to trawl and pole-and-line), not only because it catches the bigger fish which have accumulated more mercury, but because there's also a lot of bycatch. So I think I've made the right choice here: less mercury in my body, and less dead marine mammals, turtles, and other fish and invertebrates. I know it's important to eat at least a little fish, since it has omega 3 fatty acid, which humans can't produce on their own. Apparently you can also get omega 3 fatty acids from flaxeed oil and algal oil. I eat fish only occasionally, but I'll replace my canned tuna with a more sustainable choice (of a species and fishing method that is easily identified on the package) or by eating more flaxseed oil. At least until Starkist will tell me what kind of tuna I just ate. I'm so proud of my students today! Last fall, a few students built a worm compost bin for the Montreal Campus of Champlain College of Vermont. It was part of their activism project that I require for students in my environmental science course. By the end of the fall semester, they had built a compost bin out of two big rubbermaid containers and created two beautiful color posters to explain what should be composted and as how to take care of the bin. During the spring semester, another student acquired worms and diligently maintained the compost each week. I was really impressed by his commitment to it - he came to the campus every day to spritz water into the bin, and feed the worms vegetable scraps that another student collected. He even spent hours (literally, hours) sifting through the compost to separate tiny pieces of styrofoam that we acidentally dumped into the bin from a dead potted plant. (That was all my fault, it was my idea). The vermi-compost bin has been plugging away for months now, slowly eating many pounds of food that would have otherwise been tossed into a landfill.
However, there isn't really that much food that is thrown out on campus, due to its small size. Today, my coworker Stefi helped me bring the compost bin to Dans La Rue, a local non-profit, serving homeless and at risk youth. In addition to their large kitchen, part of the services that Dans La Rue offers is a daily job program. One of the aspects of this program is a gardening project that runs in conjunction with the residents of a low-cost housing project. I'm so proud that my students came up with an idea, saw it through to the end, and passed it on to others! Not only is this beneficial to the environment by regenerating soil from organic material that would have otherwise gone to the landfill, but the students worked as a team to create a service project that will help develop other organizations in the Montreal community. I have to admit that I was a little sad to see the worms go to their new home today, since I've realized that I have become emotionally attached to them (not just the individual worms, but the project in general). :) But more than that, I'm really happy that my students used what they learned in class to make a small part of Montreal better. This weekend, I got a chance to check my garden at the cottage. It's been two weeks, so I was excited and also a little nervous to check it out. Instead of tilling the ground like usual, I used sheet mulching to layer compost/cardboard/organic material and planted the seeds on top. This definitely has benefits, but it has a downside that I didn't realize: the raccoons clearly liked something that was underneath the cardboard layers. I assume it was an eggshell or some kind of delicious, rotting vegetable that I used as my base layer. Luckily, the coons didn't totally rip up everything, but they did damage a small piece of it. But besides that, things are growing! My peas are growing the fastest, but there are the sprouts of carrots, basil, and I think spinach. I know to most people this wouldn't be a big deal, but I was actually really proud that my seeds are doing okay (despite the fact that I planted them in an area teeming with wildlife and abandoned them for two weeks). 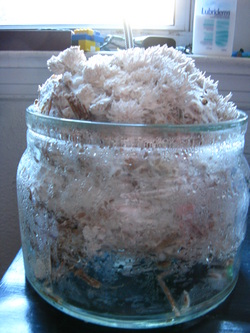 My original blue oyster mushrooms at home Over the weekend, I also transplanted my blue oyster mushrooms outside. A few months ago, I started growing mushrooms in my apartment. It started out in a medium sized jar, as you can see from the photo. However, several months later and a few fruitings later, it was taking over the container. My apartment doesn't have a lot of sun (or space), and I was running out of glass bowls to put it in. I decided that this weekend was time to either kill the mushroom entirely, or transplant it outside. I was kind of emotionally attached to my fungus, as weird as that sounds, so I felt like I should give it more space to live and make more food for me. In March, when it first produced fruit (what you think of when you eat a mushroom), I put some of it in a stew. I didn't die, so I think it's fine to eat them again. When I first started growing the mushrooms, I really didn't know what to expect, or when I would know when it's good to eat. This is a cool time-lapse video that I found that shows how blue oyster mushrooms grow. From what I've read, the fruit isn't supposed to be so long and spindely - this indicates that that mushroom needs more oxygen. 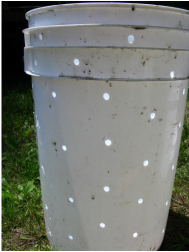 I made a holey bucket! As a wildlife biologist, my main concern was that mushrooms that I released outside would end up taking over other species and become an alien invasive species. First I did some research and asked a few mushroom experts if it was relatively safe for me to put them outside. Blue oyster mushrooms aren't native to this area, but there are a few related species. Apparently one important point is that they feed on dead material (prefrably straw or wood chips), so there's no danger of it attacking a living species. To grow oyster mushrooms outside, I had to drill holes into a bucket. Then, I layered hay with broken up pieces of mushroom mycellium (the body of the mushroom). I was initially looking for straw, but I had a really hard time finding it in the country, which surprised me. A friend had some hay at their farm, so I was lucky enough to snag some of the leftovers. 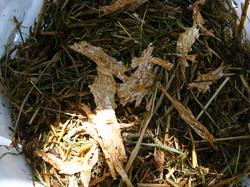 Layers of mycellium and hay in the bucket It actually took me relatively little time to make a holey bucket and layer it with hay and mycellium. The hardest part was getting the supplies. Once I closed my bucket, I put it in a sunny area (but not full sun). I'm not sure if this is the best location for the mushrooms, but I thought it might be a good place to try it out. |
About ShonaI'm an eco-conscious girl from Montreal, Quebec. I'm currently an adjunct science professor at Champlain College of Vermont (Montreal Campus). I'm interested in any opportunities to expand my experience with grassroots activism, climate change legislation, or environmental education. Archives
March 2016
Categories
All
|

 RSS Feed
