|
I love cider. When I was in Scotland, this was my drink of choice at the pub. Back in Montreal, hard cider is less easy to come by. This fall, I decided to try one of my most ambitious projects yet: making alcoholic cider from apples in the area. After a bit of searching, I found a good set of instructions from instructables. Instructables is a cool website that people upload directions on how to do just about anything. It's up there on my list with reddit and StumbleUpon for sites that teach you random interesting things. Slash waste tons of time. Anyway, once I found the instructions, I had to find a LOT of cheap apples. I found a farm stand in the Eastern Townships that was selling 20 pounds of deer apples for $5, so I filled my car with those. Since they were ground apples, some were getting kind of gross, but after a quick pick through them, I brought them back to the city. 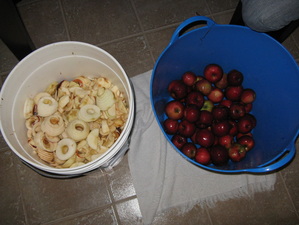
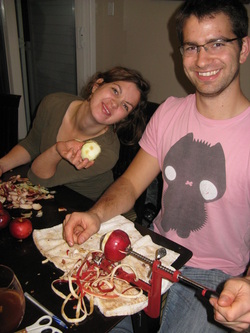 The first step was to wash, peel and cut the apples. I bought an apple corer/peeler on Amazon for about $20, so that made the job go much faster. It made a huge mess (as you can see from the photo) and then we had to find buckets big enough to store 50 pounds of cut and peeled apples. The next day, we had to juice all the apples. We borrowed a friend's juicer, and Lacey spent hours and hours sticking hundreds of apple pieces in the tiny juicer. Worse, there was still lots of juice left in the pulp, so we had to use a (clean!) pillowcase to strain the applesauce to get more juice. It would have been much better if we had dedicated an entire Saturday or Sunday to do this project, but instead we broke it up into several evenings during the week. Either way, it felt good when we finally had about 16 gallons of apple juice. Next, I had to pasturize the apples. I heated the apple juice wihout boiling it, kept it at this temperature for about 5 minutes (I would suggest being more precise about this), then poured it into my sanatized primary fermenter, which was a food-grade plastic carbouy. I should have waited to let the juice cool down before putting it into the carbouy, because it warped the sides. (Sorry Issac!) I then added about 3 yeast packets and a tablespoon of yeast nutrient and stirred it up. We also added 2 cups of white sugar and 2 cups of brown sugar to increase the alcohol content and make it sweeter. Since our apartment doesn't have any closets, we stuck it behind the door of the kitchen. And then...we waited. After a few days, the cider started to bubble as it fermented. Within about a week and a half, the bubbling stopped, and we knew it was time to separate the cloudy apple bits which settled out on the bottom. 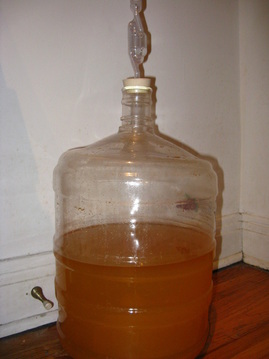
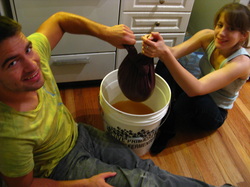 Also filtered some of the sediment with a pillowcase to get more of the juice out. (After you spend so long cutting/peeling/juicing/fermenting the apples, anything wasted seems tragic). I used some of the sediment to make applesauce muffins, which actually turned out pretty good considering its made from fermented apple mush. The instructions recommend that you leave the cider to age in a cool, dark place for another few weeks. 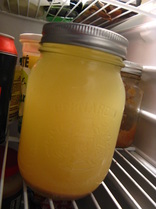 Since I had some extra cider that seeped out of the pillowcase later, I drank some of it last night. Was it delicious? No. I added two teaspoons of sugar to my cup, and that improved it a bit. It does seem a bit alcoholic, and it tastes like apples (kind of) so I guess we succeeded.
Will I do this again next year? ....maybe. I would definitely try to use a cider press to cut out of the mind-numbing cutting/peeling/juicing part, or I would use apple juice from a farmers market and skip all of those steps entirely. But, this fall's project has been fairly successful and I have some cider to drink!
1 Comment
|
About ShonaI'm an eco-conscious girl from Montreal, Quebec. I'm currently an adjunct science professor at Champlain College of Vermont (Montreal Campus). I'm interested in any opportunities to expand my experience with grassroots activism, climate change legislation, or environmental education.  Hiking on Fox Glacier in
New Zealand Archives
March 2016
Categories
All
|
 RSS Feed
