|
I love cider. When I was in Scotland, this was my drink of choice at the pub. Back in Montreal, hard cider is less easy to come by. This fall, I decided to try one of my most ambitious projects yet: making alcoholic cider from apples in the area. After a bit of searching, I found a good set of instructions from instructables. Instructables is a cool website that people upload directions on how to do just about anything. It's up there on my list with reddit and StumbleUpon for sites that teach you random interesting things. Slash waste tons of time. Anyway, once I found the instructions, I had to find a LOT of cheap apples. I found a farm stand in the Eastern Townships that was selling 20 pounds of deer apples for $5, so I filled my car with those. Since they were ground apples, some were getting kind of gross, but after a quick pick through them, I brought them back to the city. 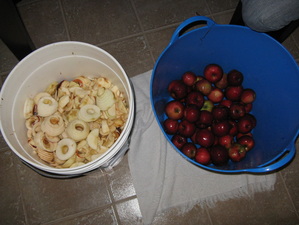
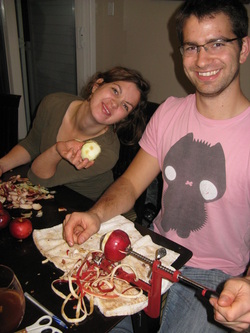 The first step was to wash, peel and cut the apples. I bought an apple corer/peeler on Amazon for about $20, so that made the job go much faster. It made a huge mess (as you can see from the photo) and then we had to find buckets big enough to store 50 pounds of cut and peeled apples. The next day, we had to juice all the apples. We borrowed a friend's juicer, and Lacey spent hours and hours sticking hundreds of apple pieces in the tiny juicer. Worse, there was still lots of juice left in the pulp, so we had to use a (clean!) pillowcase to strain the applesauce to get more juice. It would have been much better if we had dedicated an entire Saturday or Sunday to do this project, but instead we broke it up into several evenings during the week. Either way, it felt good when we finally had about 16 gallons of apple juice. Next, I had to pasturize the apples. I heated the apple juice wihout boiling it, kept it at this temperature for about 5 minutes (I would suggest being more precise about this), then poured it into my sanatized primary fermenter, which was a food-grade plastic carbouy. I should have waited to let the juice cool down before putting it into the carbouy, because it warped the sides. (Sorry Issac!) I then added about 3 yeast packets and a tablespoon of yeast nutrient and stirred it up. We also added 2 cups of white sugar and 2 cups of brown sugar to increase the alcohol content and make it sweeter. Since our apartment doesn't have any closets, we stuck it behind the door of the kitchen. And then...we waited. After a few days, the cider started to bubble as it fermented. Within about a week and a half, the bubbling stopped, and we knew it was time to separate the cloudy apple bits which settled out on the bottom. 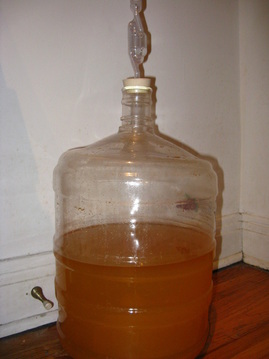
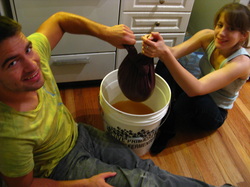 Also filtered some of the sediment with a pillowcase to get more of the juice out. (After you spend so long cutting/peeling/juicing/fermenting the apples, anything wasted seems tragic). I used some of the sediment to make applesauce muffins, which actually turned out pretty good considering its made from fermented apple mush. The instructions recommend that you leave the cider to age in a cool, dark place for another few weeks. 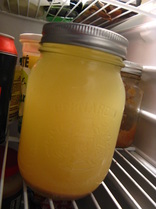 Since I had some extra cider that seeped out of the pillowcase later, I drank some of it last night. Was it delicious? No. I added two teaspoons of sugar to my cup, and that improved it a bit. It does seem a bit alcoholic, and it tastes like apples (kind of) so I guess we succeeded.
Will I do this again next year? ....maybe. I would definitely try to use a cider press to cut out of the mind-numbing cutting/peeling/juicing part, or I would use apple juice from a farmers market and skip all of those steps entirely. But, this fall's project has been fairly successful and I have some cider to drink!
1 Comment
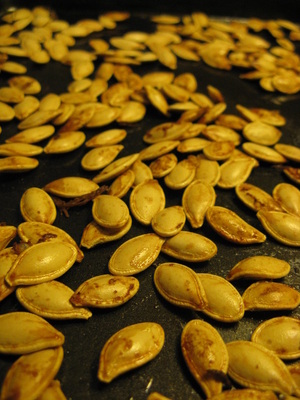 Roasted pumpkin seeds Happy Halloween! This year, I was a circus ring leader, and I decided to keep with the theme of the year: eating what's in season. Pumpkins aren't really used that much in typical North American cuisine, besides the staple pumpkin pie. I'm familiar with carving pumpkins...but with so many pumpkins around, I knew there had to be something else I could do with them. This season, I discovered two excellent pumpkin uses: roasted pumpkin seeds, and stuffed pumpkin. Roasted Pumpkin Seeds It seems like everyone has known about roasted pumpkin seeds besides me. I had bought them in a store before, but I had no idea how easy they are to make (especially when you have just carved a pumpkin and have tons of pumpkin guts everywhere). Apparently my family completely bypassed this Halloween tradition. Just in case you didn't grow up with this either, here's how to make them: Step one: Get a pumpkin. Preheat the oven to 300 degrees F. Step two: Carve the pumpkin and take out the seeds. Rise the seeds in water to get the pumpkin guts off of them. Step three: Oil a baking sheet. Place the seeds flat on the baking sheet. Step four: Sprinkle salt on the seeds. Almost any other herbs or spices will work too - just salt and oil is great, but curry and sugar is amazing. Step five: Bake for about 45 minutes, checking on them periodically. They're done when they're crispy and slightly brown. Ta-da! Deliciousness. 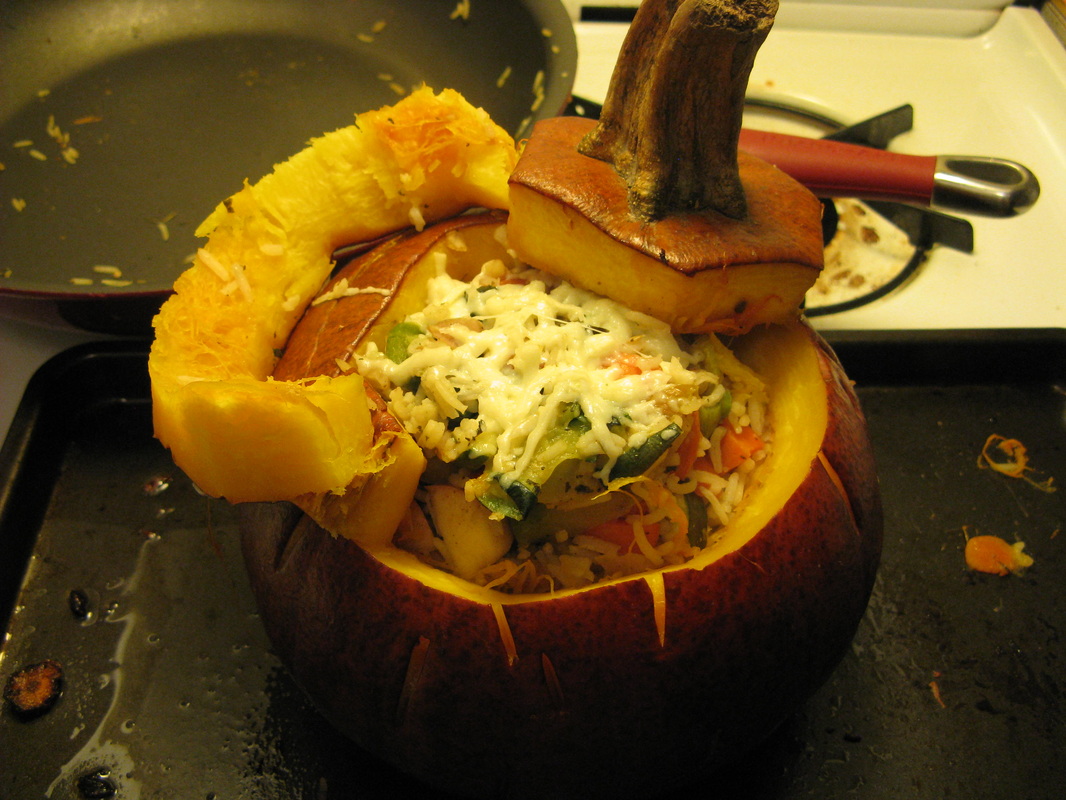 Stuffed Pumpkin
Yeah Shona, you say, but what do we do with the rest of the pumpkin, now that it's hollowed-out and seedless? Stuff it with rice, vegetables, apples, nuts, and spices! I found this recipe on a Mother Earth News blog last night, and the writer made this stuffed pumpkin as the main course instead of a turkey. How about that, vegetarian friends? Since I never follow recipes exactly, I changed it a bit. Here's my version: 1 medium pumpkin ~2 cups chopped veggies (carrots, zucchini, celery, peppers, eggplant, whatever you have in your fridge) 1 medium onion 2 cloves garlic 1/2 cup cooked rice 1 tbsp sage 1 tbsp oregano 1 tbsp thyme 1 tsp cinnamon 1/4 cup chopped walnuts 1/4 cup raisins 3 apples (chopped) 1/2 tsp parmesan 2 tbsp mozzerella Preheat the oven 350 F. Hollow out the pumpkin. Put about 1 tbsp of butter or margerine in the bottom. Jab slits with a knife throughout the pumpkin. Put the pumpkin's top back on. Leave it in the oven until the pumpkin flesh is tender when you poke it. In a frying pan, sautee onion and garlic together. Add celery, zucchini, peppers, etc. After about 5 minutes, add the cooked rice and sage, oregano, thyme, and a little bit of salt and pepper. Chop apples and sprinkle the cinnamon on them. When the rice has heated up, add the parmesan, apples, walnuts, and raisins. Keep this on low until your pumpkin has finished cooking. If you have tons of time, you can cook the vegetable stuffing by leaving it in the pumpkin for about three hours. As I made this on a Sunday night and didn't feel like spending the entire day making supper, I cooked the vegetables and rice in a frying pan and them added them to the cooked pumpkin, putting the top back on the pumpkin.I left mine in there for 15 minutes, but I think the longer it stays cooking in the pumpkin, the better. But come on people, we all have other things to do. I took the top off and put grated mozzerella cheese on it in the last 5 minutes. When you are tired of waiting the flavours to mix together in a steamy, buttery pumpkin bed, take the pumpkin out and cut a bigger hole in the top so you can scoop it out. Make sure you scrape off some of the pumpkin on the side! If you tried it, let me know! Also tell me if you made any modifications that improved on it. It was my birthday last weekend, and I asked my parents for two things for my birthday: a second hand food dehydrator, and some manure. I got both, thanks Mom and Dad! My parents are convinced I'm weird. With my new dehydrator, I made crispy dried apples. It was super easy, and it only took about an hour of prep and 10 hours in the dehydrator. I cut the apples and soaked them in a half lemon juice, half water mixture while I cut the rest of the apples. The lemon juice is so the apples don't turn brown. I could have peeled the apples, but that would have taken way longer, so I left them on. Once I cut up an entire bag of Gala apples, I laid them on the plastic frames of my American Harvest dehydrator, and sprinkled them with cinnamon. Then, I turned the dehydrator on to 135 F and left it in there for 10 hours. 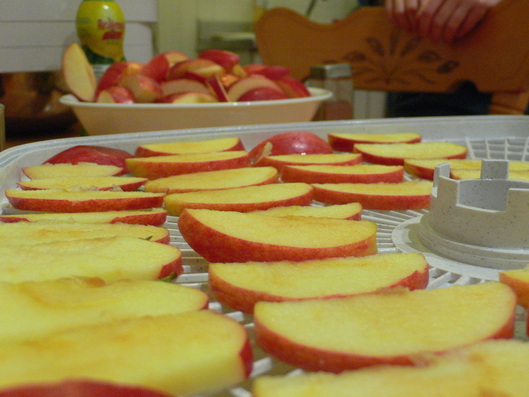 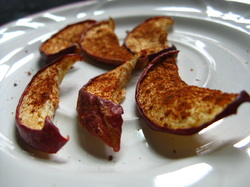 When I woke up the next morning, I tasted the dried apples and put them in a ziplock bag. I've eaten them like that as a snack, or crunched them up and put them in my cereal. Super simple!
Now I just need to invest in an apple corer/peeler to make the next batch ten times faster. It's harvest time! My garden is slowly dying out, my bees are making honey, and I've been busy canning. I just got a sweet new job at the Ecomuseum, an educational zoo in Montreal, so I've been extra busy lately. Last weekend, I harvested my potatoes, which did surprisingly well considering the really poor soil quality that I started with. My zucchini, squash, and cucumbers did not do so well, which shouldn't surprise me since I didn't have enough compost to help them, and didn't want to use synthetic fertilizers. 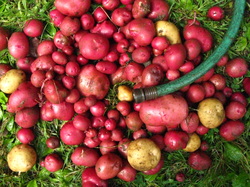 I was kind of disappointed that my tomatoes never ripened. But it's pretty cold where they are in the eastern townships, so I ended up with about 15 pounds of green tomatoes. At first, I had no idea what to do with this nearly useless product. However, I found a cool recipe for green tomato salsa, which was super easy to make. I adapted it since I didn't have cumin or hot peppers on hand, and just added some Frank's Red Hot sauce and it turned out fine. I ended up making 8 jars of green tomato salsa, and I also had some fried green tomatoes for breakfast. I was pretty happy to turn something that I thought was a failure into something delicious! 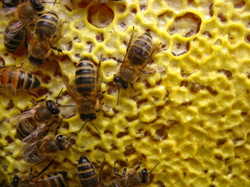 Bees with capped honey for winter My bees have filled up the whole first box of frames that they started with. My hive is still too small to harvest honey from this year. They need the honey to eat during the winter. I have to admit, I've been stealing a little from them here and there. I added another super yesterday, so they have room to expand into another box. I used the smoker for the first time, since I got stung the past two times I visited the hive. (On the bright side, I don't appear to be allergic). Apparently, bees are most aggitated in the spring and fall. This explains why during the summer the bees were pretty chill, but I got stung twice within three days last week.
Next up on the project list: pickling beets from my grandfather's garden (an old family recipe, which is amazingly delicious), making a root cellar, and figuring out what to make for the next food exchange. I'm thinking maybe making my own mozzeralla cheese, or basil olive oil. I feel like I love my bees more every time I visit them. No longer are they furious, terrifying insects two stings away from possibly sending me into anaphalactic shock. Now, I see them as totally engrossing, amazing, and ecosystem-important girls (since all the workers are female). It's super cool to see how much the hive has reproduced every time I visit. It seems that all of my 6 new frames have started to be built on. Instead of me rambling on about how much I love my bees, I'll just show you some pictures. Maybe you'll be convinced of how awesome they are. 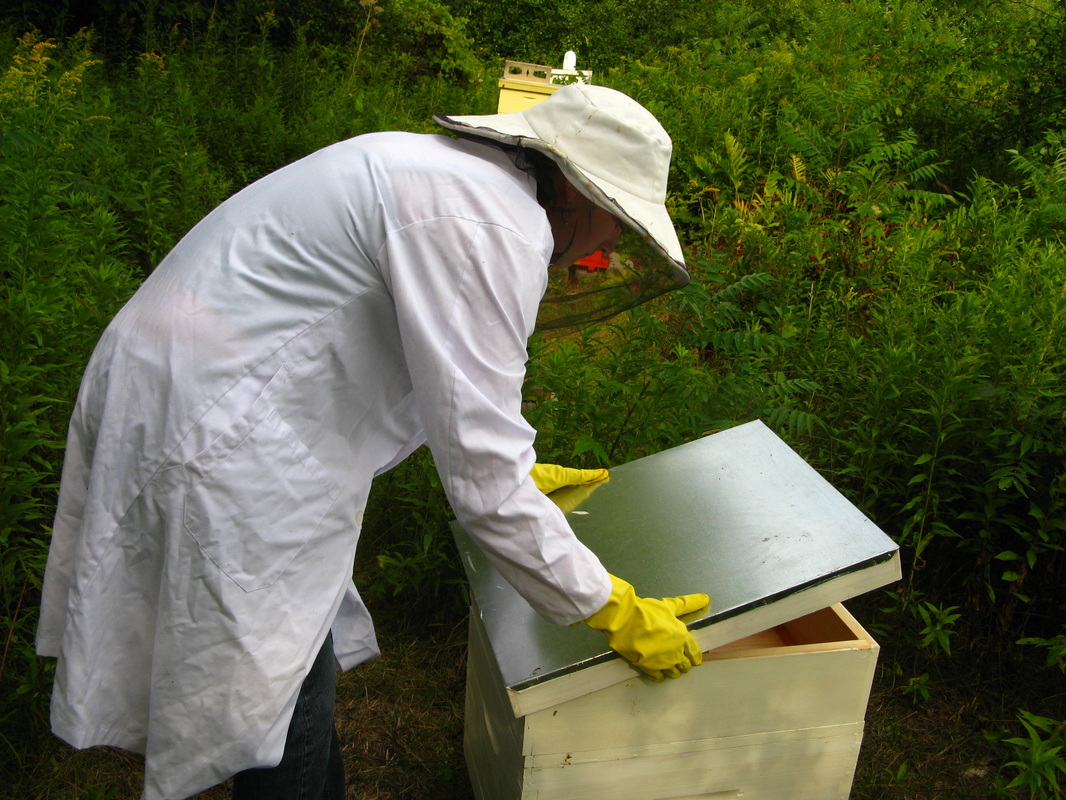  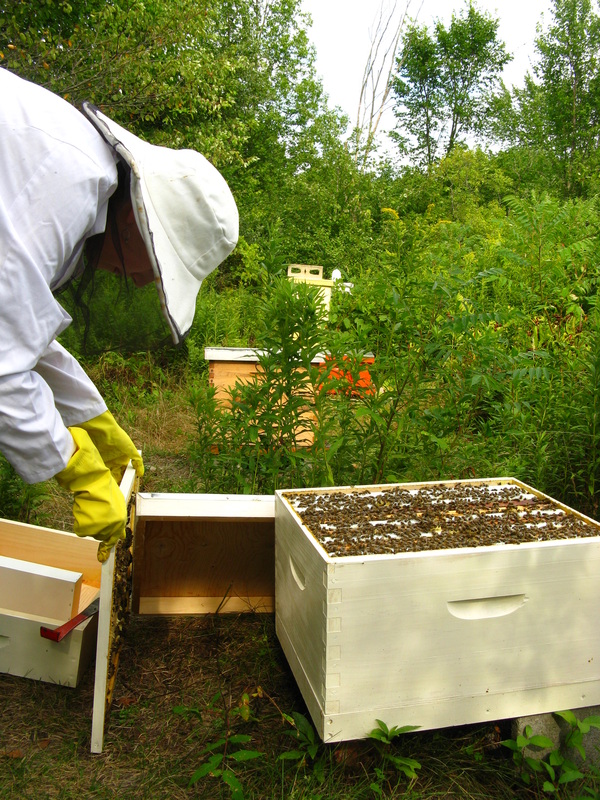 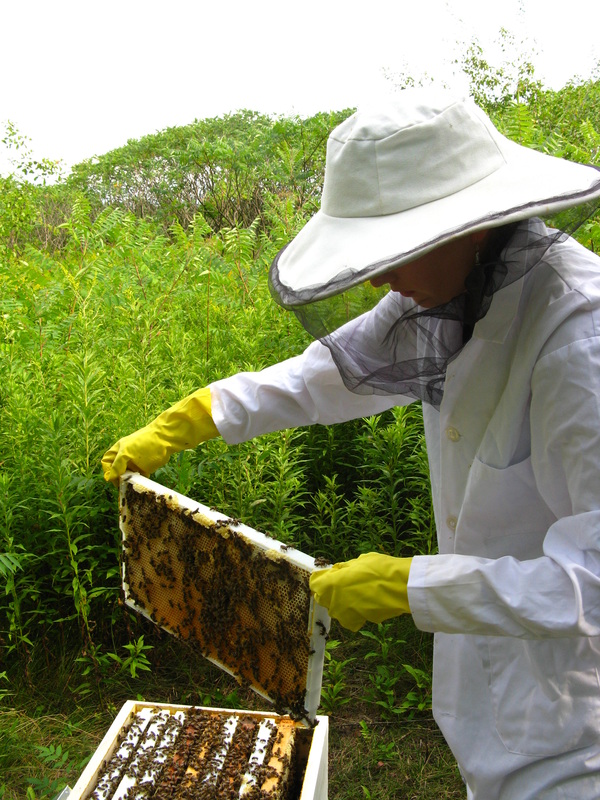 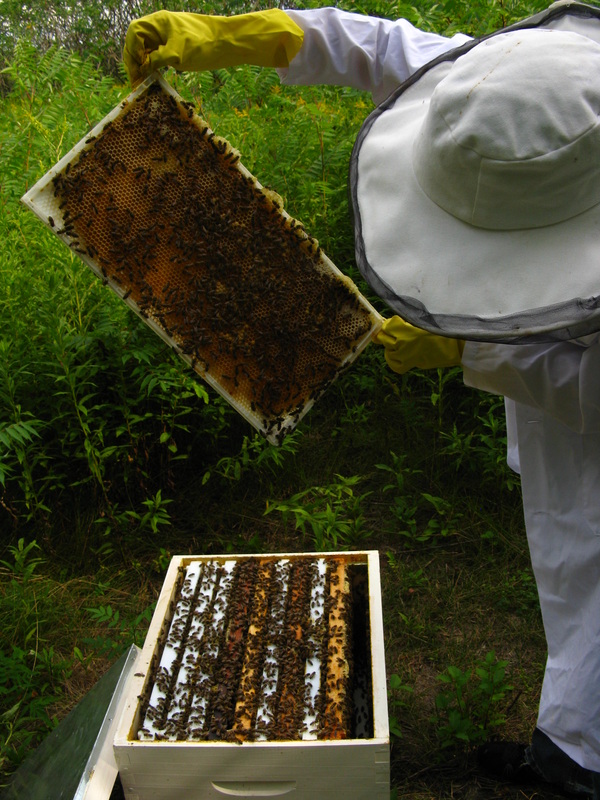 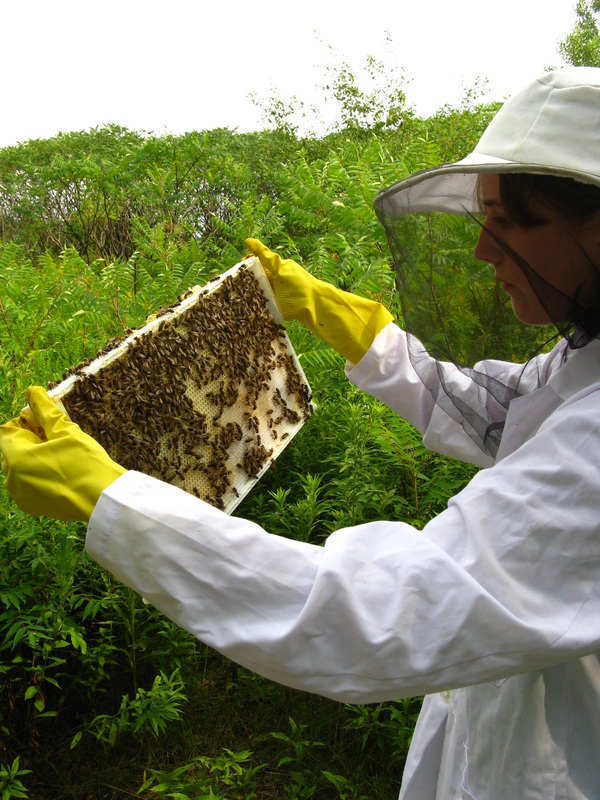 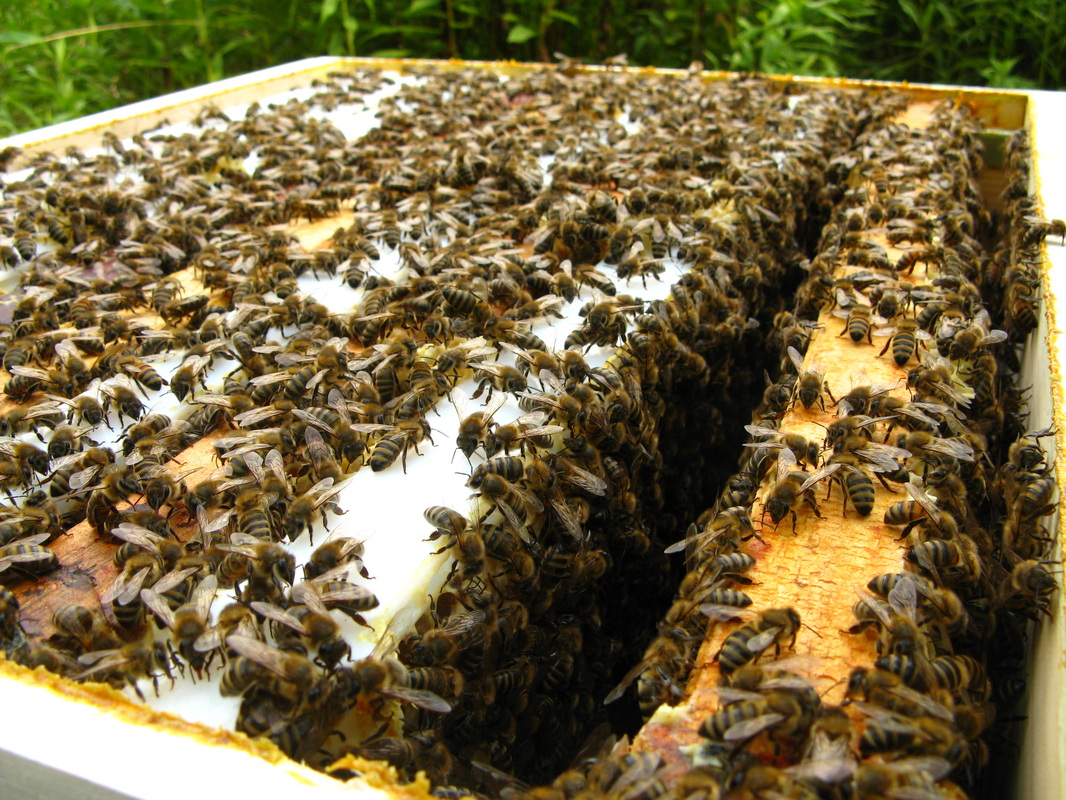 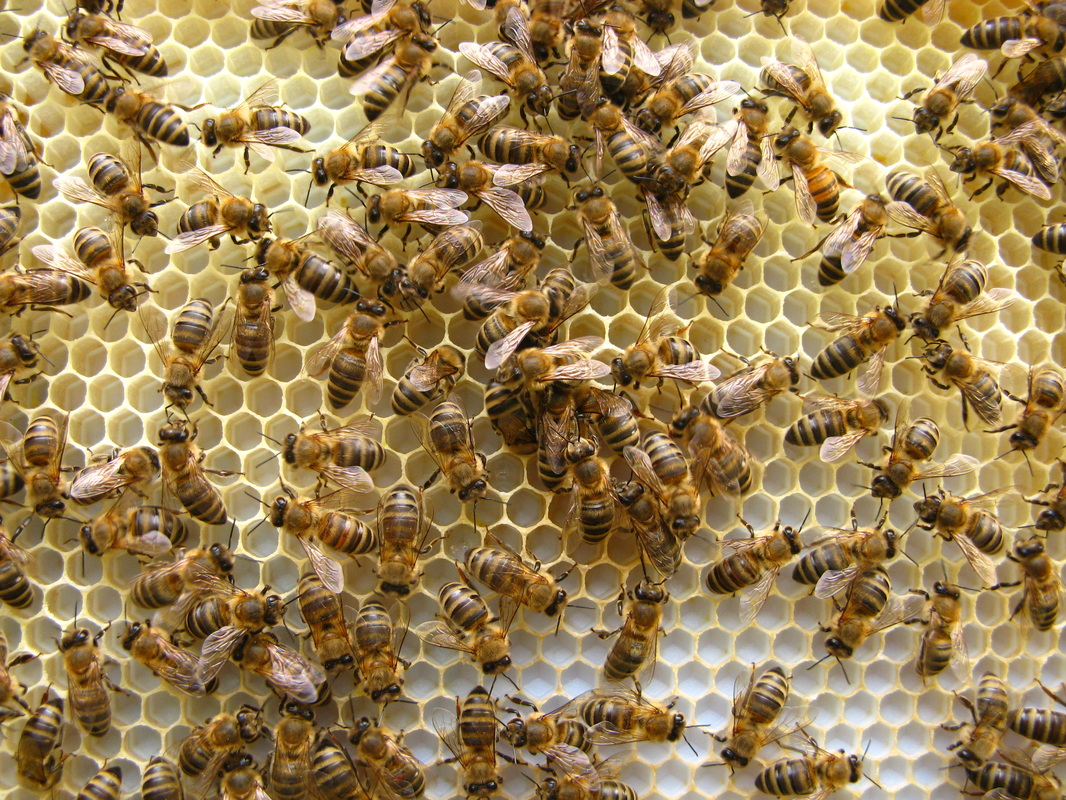 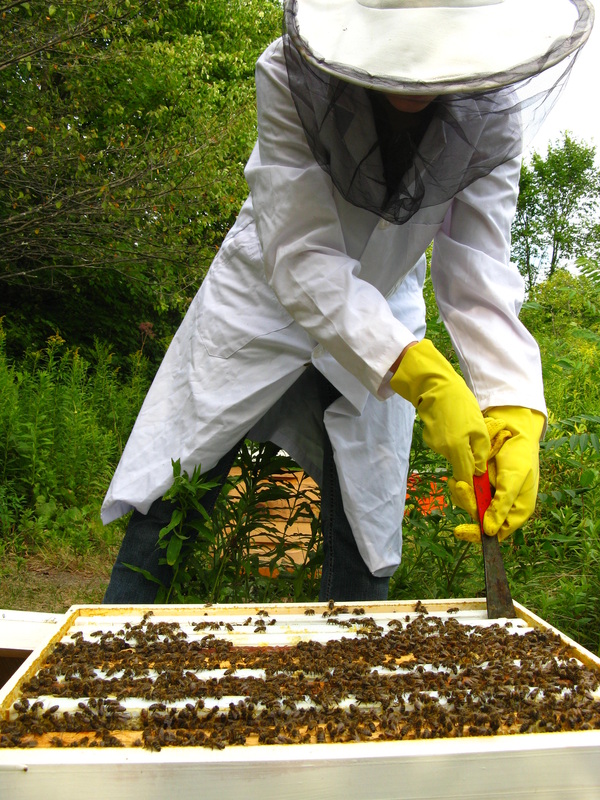 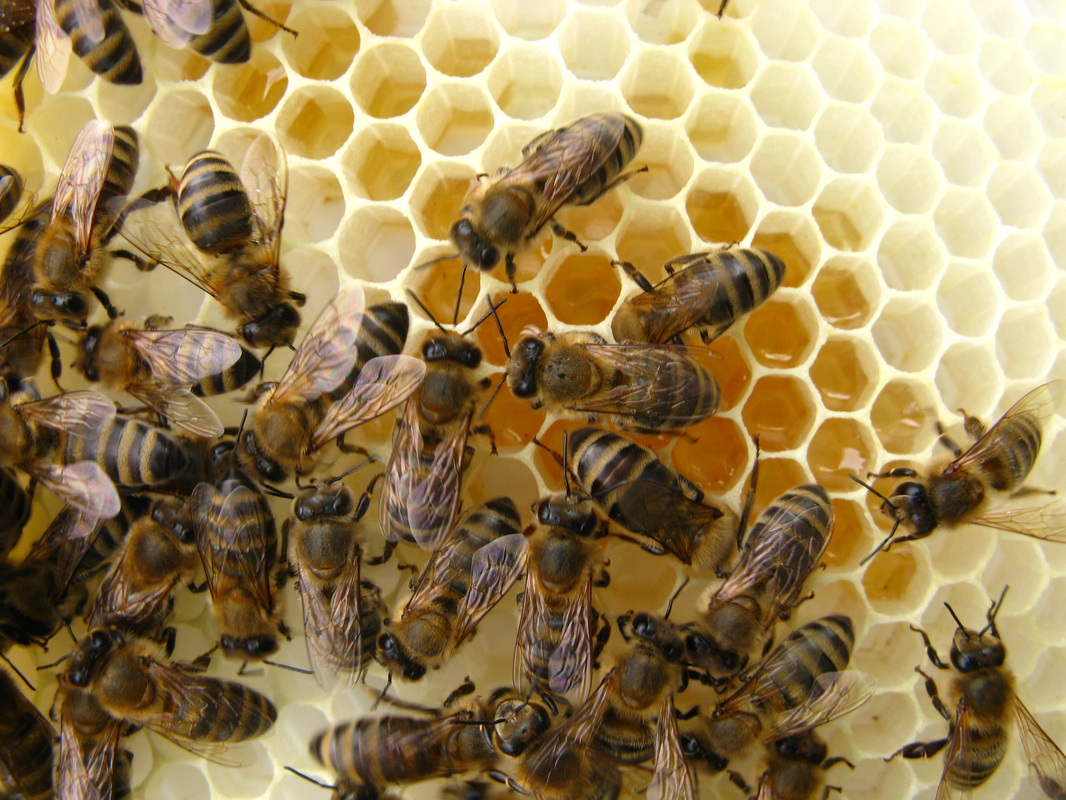 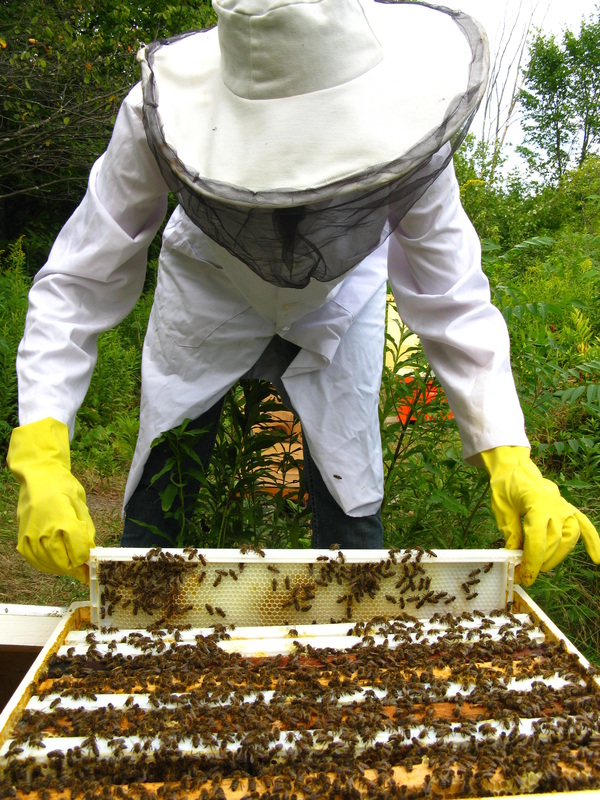 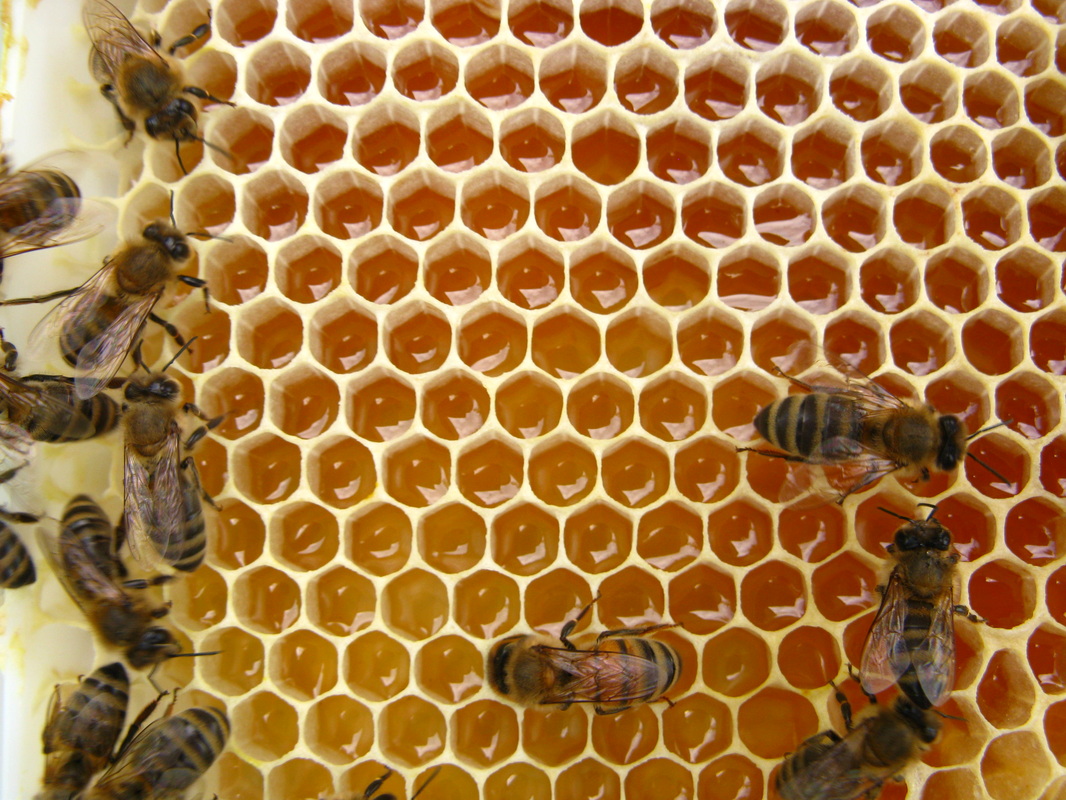 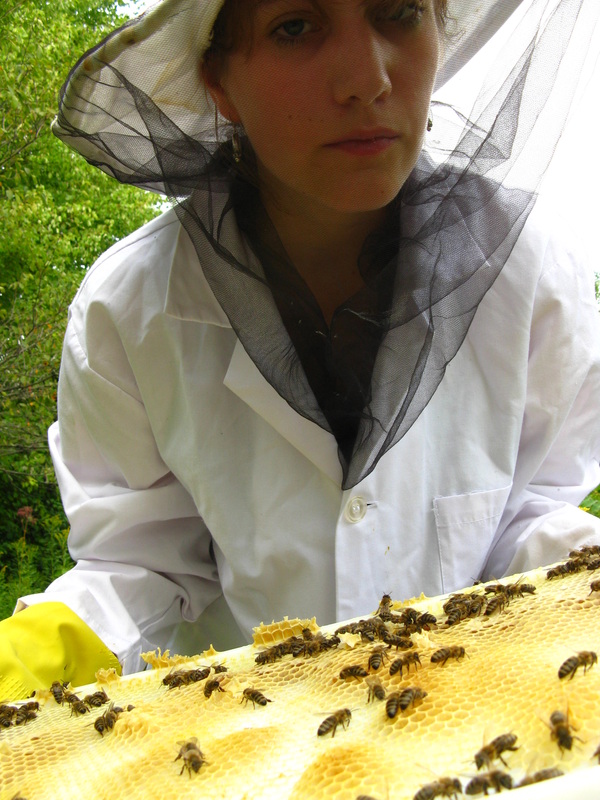 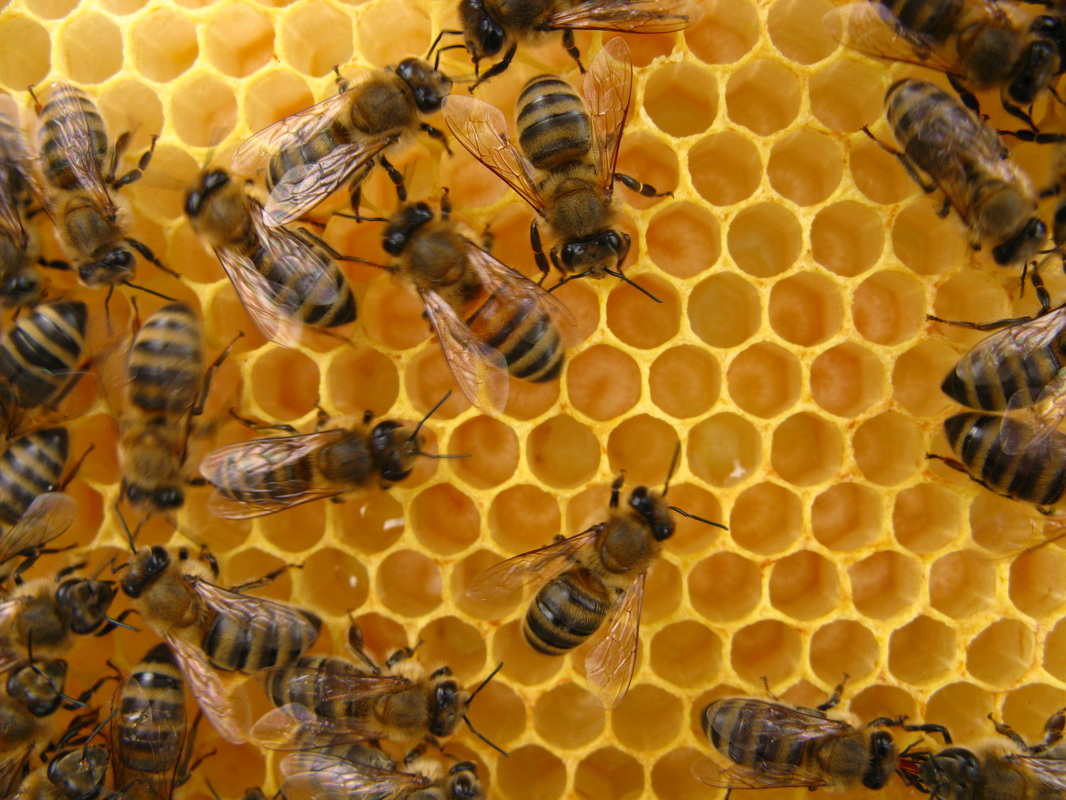  I get a weird satisfaction from preserving food. Maybe it's the process of turning something ephemeral into something that I can eat in the future, or the pride I get from learning a new skill. In any case, I've been trying to do a lot of canning and freezing this summer. I spend a lot of time in the Eastern Townships, where there are tons of farms and produce stands along the road. It's a nice feeling when I can see a garden behind the produce stand...it's the epitome of eating local. It also seems cheaper than buying fresh frutis and vegetables at one of the markets in Montreal. My own garden is doing pretty well, considering I can only visit it once every two weeks. The only thing I've been able to harvest so far are peas, but soon I should have carrots, tomatoes (crossing my fingers), cucumbers, pumpkins, zucchinis, and basil (crossing my fingers and my toes). Surprisingly, the only real animal problems I've had were the racoons that dug up the cardboard I used as a base, since there was compost underneath. It took out a few basil plants, but there are still three plants hanging in there. I wish I could visit it more, but that's why I needed a small, managable garden that would need minimal weeding. 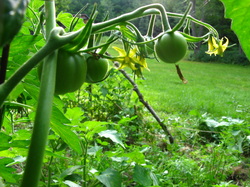 This summer, I've made enough strawberry/rhubarb and raspberry jam to last me until next year. I've also started freezing spinach from my grandfather's garden for pastas in a few months. Yesterday, I added something else to the list: vacuum packed blueberries. I like freezing food and having it for later, but a lot of times the quality is diminished and instead tastes like ubiquitous freezer burn. I found out my friend has a vacuum packer, so we picked 6 liters of blueberries at the farm across the street (doesn't get any more local than that!). We kept 2 liters fresh, but sealed the rest. It was super easy to vacuum pack them, you really just put the blueberries into a bag and stick it into the machine. The machine sucks all the air out, and apparently almost doubles the life of the food. Then you stick it in the freezer. 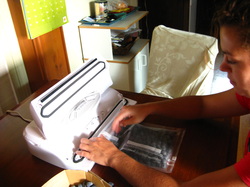 Vacuum packer 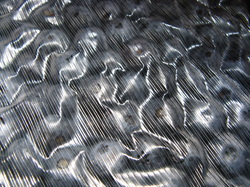 Vacuum sealed blueberries 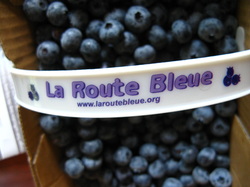 I'll let you know if they still taste good in 6 months. It's been about a month since I've had my beehive, so I think it's time for an update. Putting the hive together and adding the workers, drones, and queen went off without any problems. Now comes the scariest part: actually opening my beehive. I've been advised to check on my beehive every two weeks, so by now I've checked on them three times. I was really nervous the first time I opened my hive. I've still never been stung, so I don't know if I'm deathly allergic or not. Apparently the odds of actually being deathly allergic are extremely low (I've heard estimates that about 1% of the population). But I would like not to find out the hard way that I am in that select 1%. So, I was incredibly nervous the first time because: 1) I had no idea what I was doing, even though I had watched hives being opened by various people at the apiary, and 2) I didn't want to get stung and die Since I'm still writing this blog, clearly option 2 didn't happen. The first time I opened the hive a month ago, I noticed that the bees hadn't built up the honeycomb to the plastic frames. My hive was started with 4 wooden frames from another beekeeper who was generous to spare me some of his workers. Those established frames have always been doing well, but it has taken about a month for the bees to start building on the new frames. At first I was told that it was because I didn't wax the plastic frames, so I spent an evening melting old wax and painting it on my 20 plastic frames. 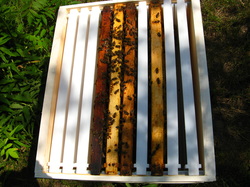 How my hive started: 4 frames full of established worker bees, 6 frames of my unwaxed plastic frames But to be honest, the fact that bees were on the old frames but not the new ones was about ALL I noticed on my first visit. As quietly and calmly as I could muster, I opened up the top of the hive, peeked in, lifted up one of the new plastic frames, and noticed there was a bee buzzing somewhat angrily in front of my face. I studied wildlife biology, but I think anyone could figure out that that bee was saying "GET OUTTA HERE, LADY!" So I put everything back, closed the hive, and got outta there. I also forgot to mention that I had neglected to buy plastic gloves and a water spray bottle, so the risk of being stung was higher than normal. The water bottle is good to mist the top of the frames so the bees think it's raining and retreat deeper into the hive, making it easier to pick up the frames. I realized after my first visit that I couldn't live in perpetual fear of dying from two bee stings. At my next doctor's visit, I asked for a perscription for an epipen just in case. The doctor seemed very intruiged and confused about why I would choose to raise bees, and I think spent more time talking to me about bees than the condition that I actually came to the doctor for. He also warned me that epipens are expensive. Multiple people have told me this, as if finding out that paying $50 for a potentially life-saving device would be a deal-breaker. If nothing else, it was worth the peace of mind. On my second visit, I was slightly less nervous because I had brought gloves and an epipen, but I was still deterred by a solitary angry bee in my face. I did manage to pull out one of the wooden frames to make sure the bees were making honey and brood (baby bees). These are two of the main things you should look for when you're checking your bees, since this means that the workeres are doing okay, and queen is alive and making young. There are ways to check for parasites and diseases in the hive, but I'm not that experienced yet. I was nowhere near being comfortable poking around the hive, and I wanted to check on the bare minimum and get the hell out of there. 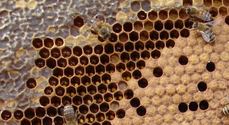 On upper left, capped honey. On lower right, brood. Photo from beesource.com 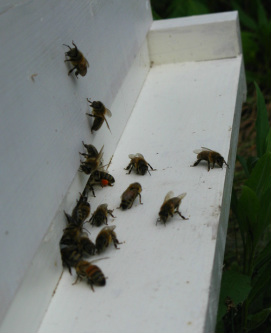 My two week mark was coming up again yesterday, so I was dreading/looking forward to check on the hive again. I took out Beekeeping for Dummies from the library, which is a really great book. I keep it (until I have to return it) in a tote bag with my camera, epipen, gloves, and lab coat. I felt more prepared this time. Since I had a little extra time, I spent about 15 minutes sitting to the side of my hive entrance, watching them. I know it's important to be calm when you check on the hive, so I was hoping that a little observation time would help me zen out. It's pretty fascinating to watch the bees dance and fly in and out of the entrance. You can see a bee heading into the hive with some pollen on its legs. When I felt sufficiently relaxed, I opened up the hive. Last time, the bees hadn't built comb on the plastic frames, but instead on the inner cover and other places that they weren't "supposed" to. I was happy to find out that there was only a little bit of comb on the inner cover, and they were actually starting to build on two of the plastic frames. (Although, not the ones I waxed, curiously enough). Success! I also felt comfortable enough to lift out the wooden frames and inspect them. I was so engrossed that I realized about halfway through that I was holding a frame of about 100 bees about a foot from my face. I think my calmness worked though, since the bees didn't seem to mind. I tilted the frames around to see that eggs had been laid, and I could see larvae at the bottom of the some of the comb. I even saw the queen on one of the frames! She's larger and longer than the workers, and is marked with a spec of white from the breeder. I was pretty happy with myself that I was finally comfortable enough to be able to spot these things. I really feel like a beekeeper now, not just a person who nervously opens up a box full of bees. 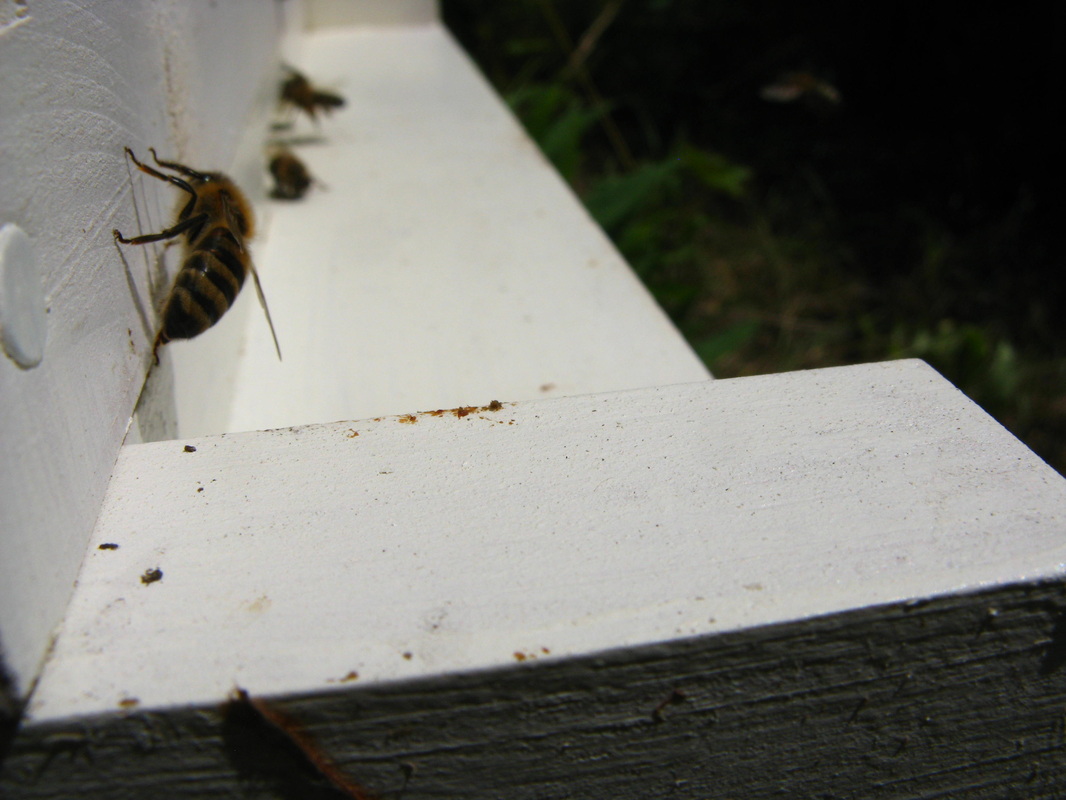 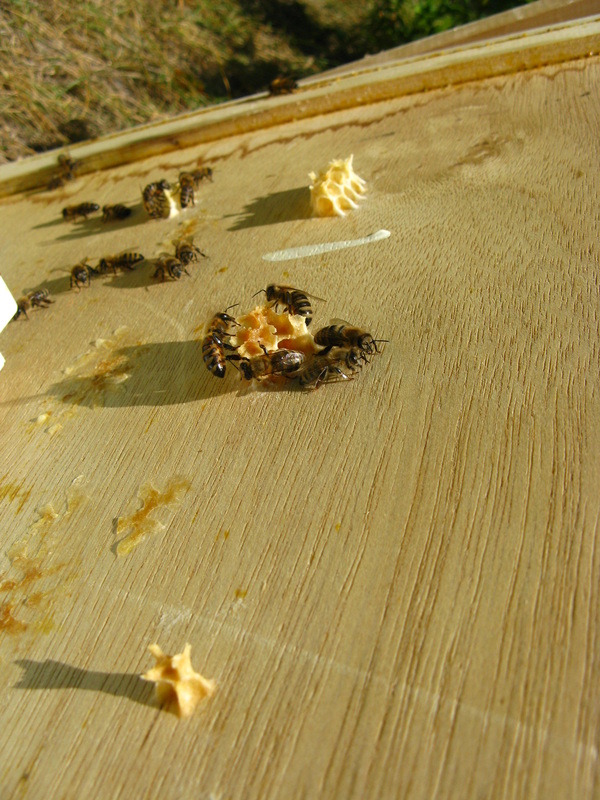   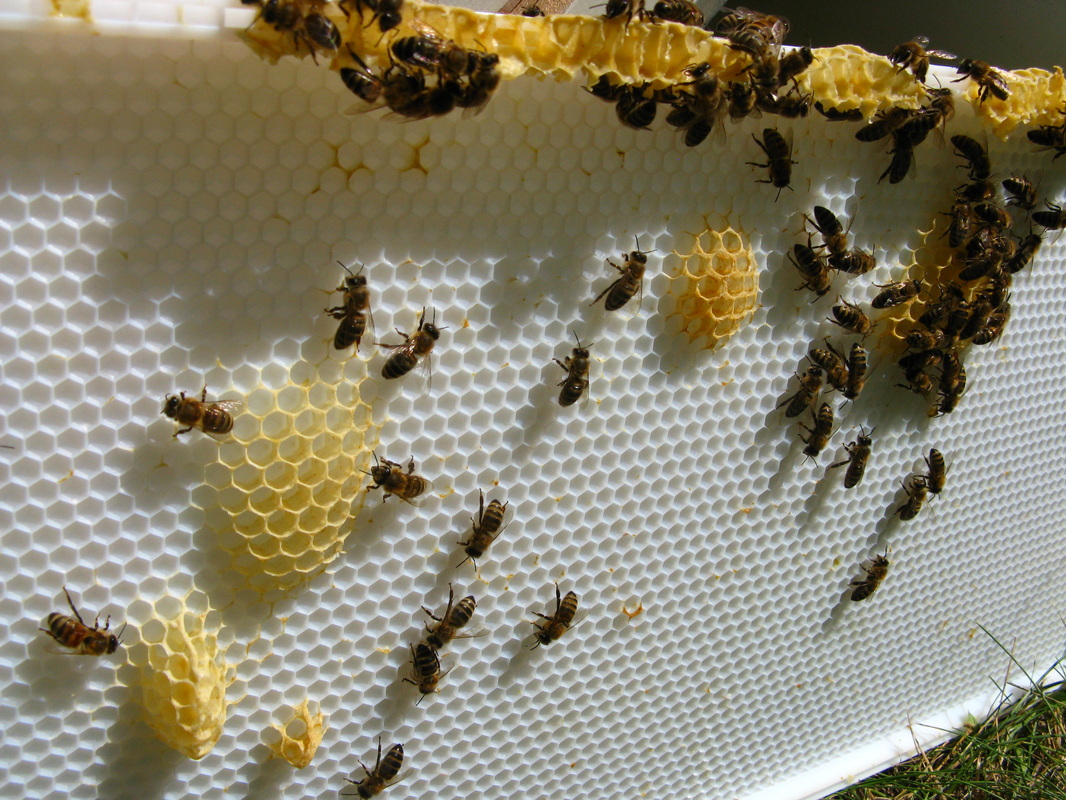 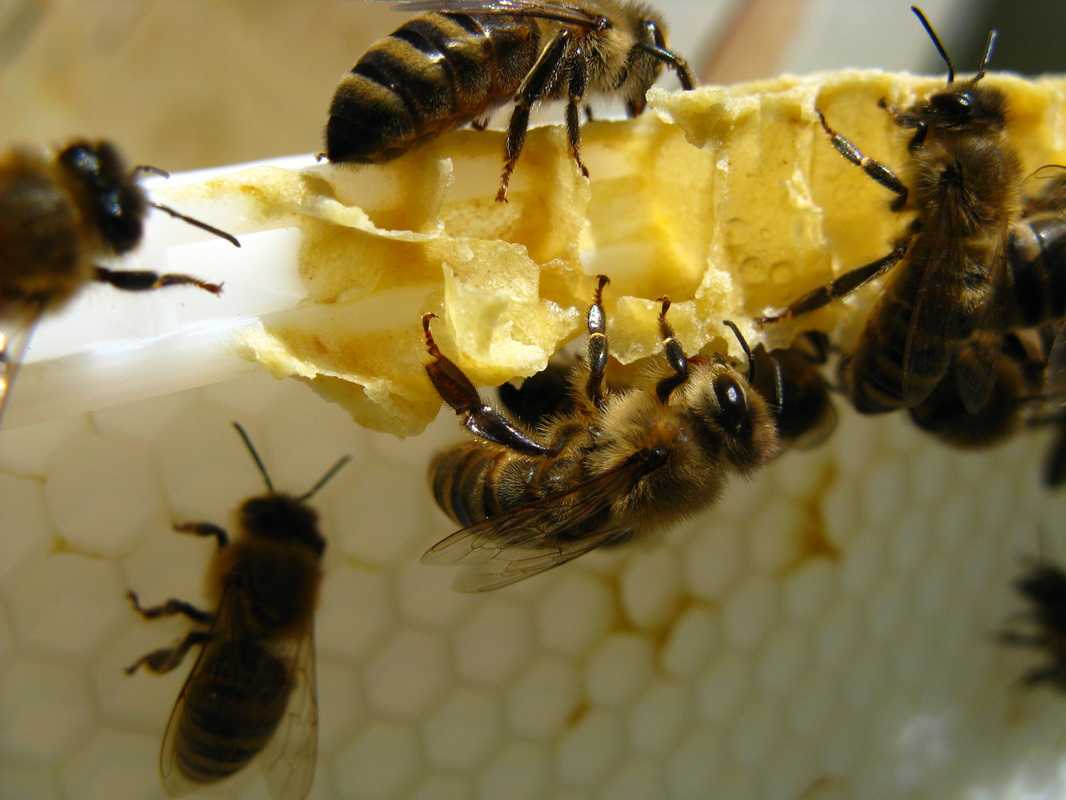   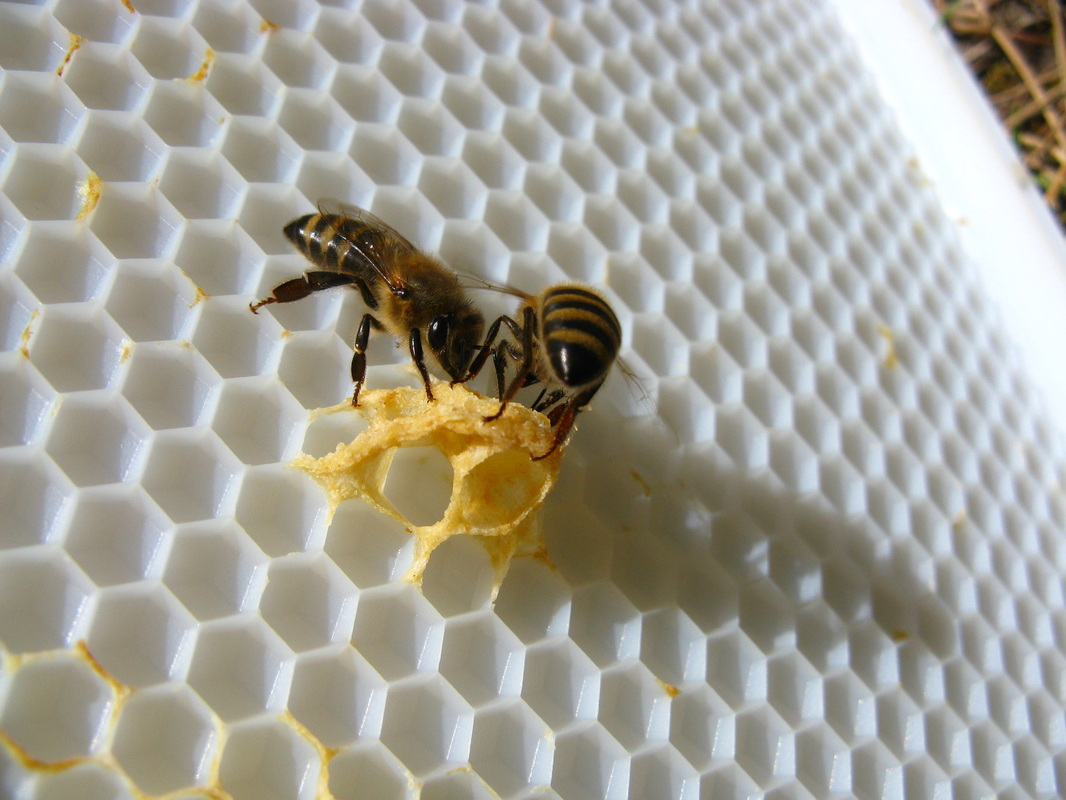 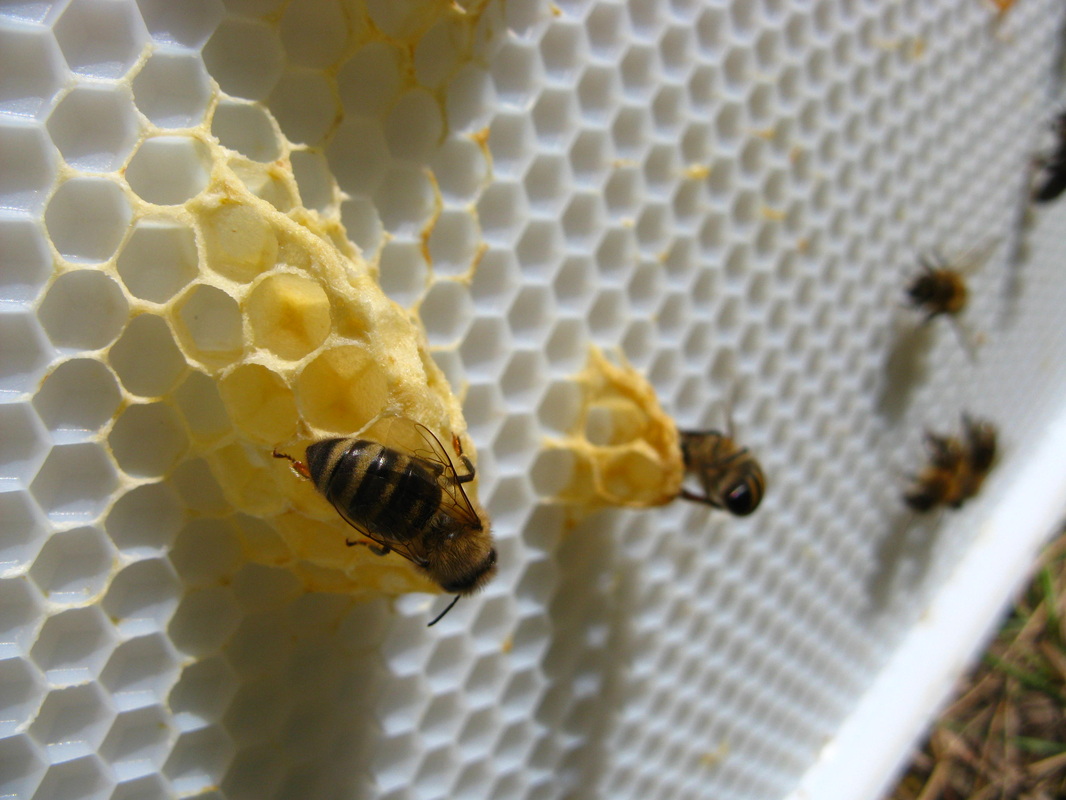  For the past few months, I've been preparing to get a beehive. I got the idea suddenly when I was on a train to Toronto: why don't I start a beehive at the cottage? I had already heard a lot about colony collapse disorder, and the mystery of why bees were dying off. On my self sufficiency kick this summer, I thought that getting some honey bees would be a good way to help the population, and make me a little honey on the side. Plus, I think anyone who has read even a little bit about honey bees finds them facinating, with their social structure and dancing. I had a hard time figuring out how to get started, but I read a few books about beekeeping for absolute beginners and tried to talk to a lot of people about it. Turns out, I had two friends and a coworker who also had bees. I realized that instead of starting one at the cottage, where I would be completely isolated and not have anyone to ask for help, I could join the McGill Community Apiary. There are communal supplies (like the mesh hats, smoker, and tools), and it's great to have a community of people to answer my questions (like..."uhh...so what do I do with these bees when I get them?"). My first step was to order the pieces of the hive. I knew I needed a series of boxes and other various wooden things, but it was Branislav, who founded the McGill Apiary a few years ago, who gave me a list of the essential parts that I needed for a Langstroth hive (the most common type). About a few weeks ago, my materials arrived from Propolis-Etc, a beekeeping supplies company in Quebec. You can buy parts of the hive already assembled and painted, but I chose to save some money by D.I.mYself. My hive costs about $170 (taxes included) for the bottom board, two medium supers (where the bees live and make honey), a feeder for the fall/spring, 20 plastic frames for the bees to make combs over (10 per super), an inner cover, an entrance reducer, and an outer cover. 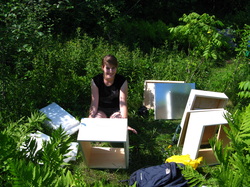 Assembling my Langstroth hive 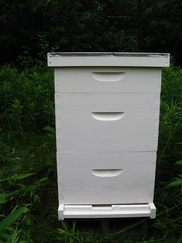 Hive all assembled and painted. I'm not very handy, so I enlisted the help of a new friend to help put it together and paint. From what I've read, it's not a huge amount of work to maintain a beehive, but they do need to be checked on every 2 weeks or so, and preparations need to be made in the fall and spring. Therefore, it's helpful to have 2 people share the work of a hive and split the honey at the end (especially when that friend lives within 5 minutes from the hive, instead of 45 minutes like myself). Next part: the bees! I had never even been near a beehive in real life until the day I put mine together. I started second guessing myeslf when I showed up the apiary and realized that I was 2 feet away from someone else's buzzing, very active hive with hundreds of scary bees. Would my hammering and talking anger them, forcing them to turn on me in a massive swarm? Nope. I could sit off to the side of a hive and watch them go in and out without them really caring. They do sting, but it seems like it's most likely when you're standing in their flight path...so stay away from the front entrance! Once I realized that the bees didn't really care that I was there, I felt more comfortable about what I had just gotten myself into. Over the weekend, Branislav took 4 frames of someone else's hive and put them in my own. The workers were happy to stay in their shiney new hive for a few days without a queen. Then, a queen and a few drones in a little plastic cage were put into my new hive. There is a bunch of sugar plugging the exit of the cage, so within a few days, they eat their way out of the container. By that time, the workers have accepted their new queen. Within a few days, you have to check to make sure the queen is still there (she's marked with a little white dot, which makes it a heck of a lot easier to distinguish a slightly larger bee from hundreds of others). I checked on my hive on Monday, and am pleased to report that it seems to be going well! I didn't realize that I had to paint the plastic frames with wax because usually the bees won't start putting eggs or honey there without that foundation. So my project today is to melt some leftover beeswax from the apiary and paint it onto my plastic frames. I had kind of gotten into beekeeping because it sounded interesting and I thought it would be good to help out the overall honey bee population. I did not expect the feeling of wonder and love when I sat next to my complete beehive and watched the worker bees dance their heart out at the entrance of the hive. And if you don't think bees are cool yet, watch this video:  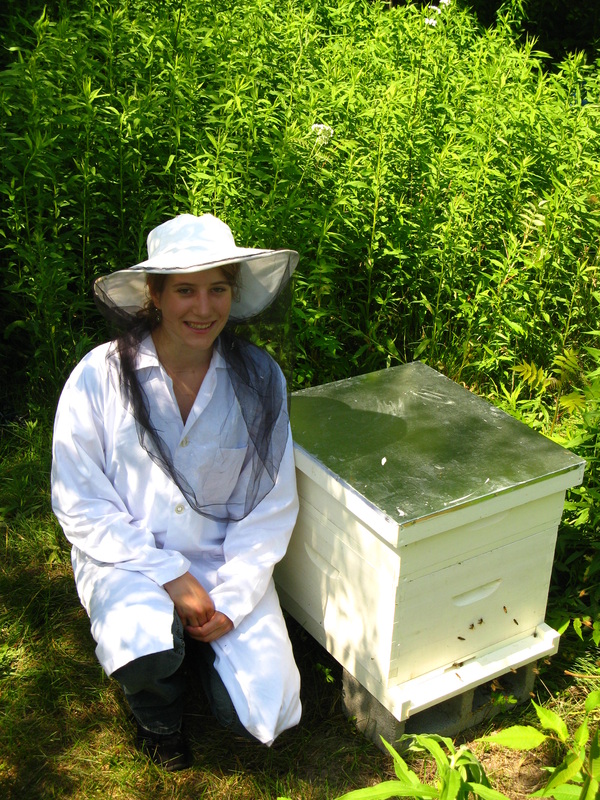  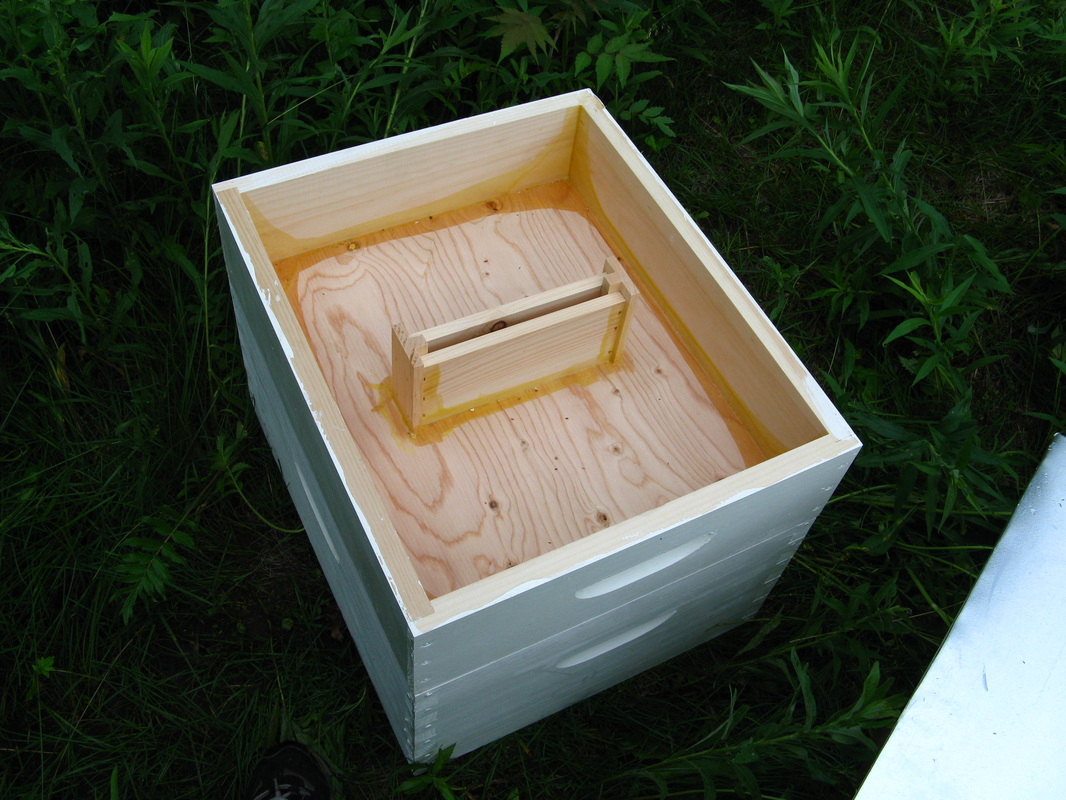  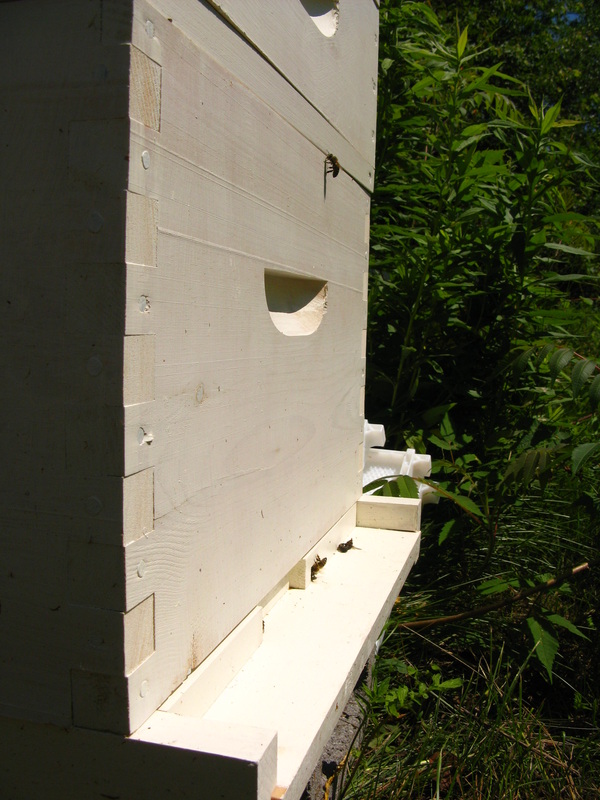 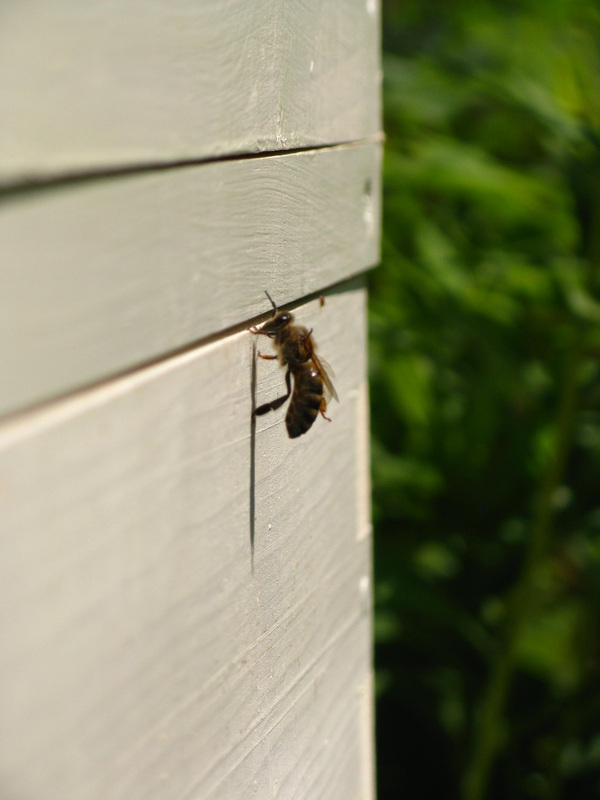 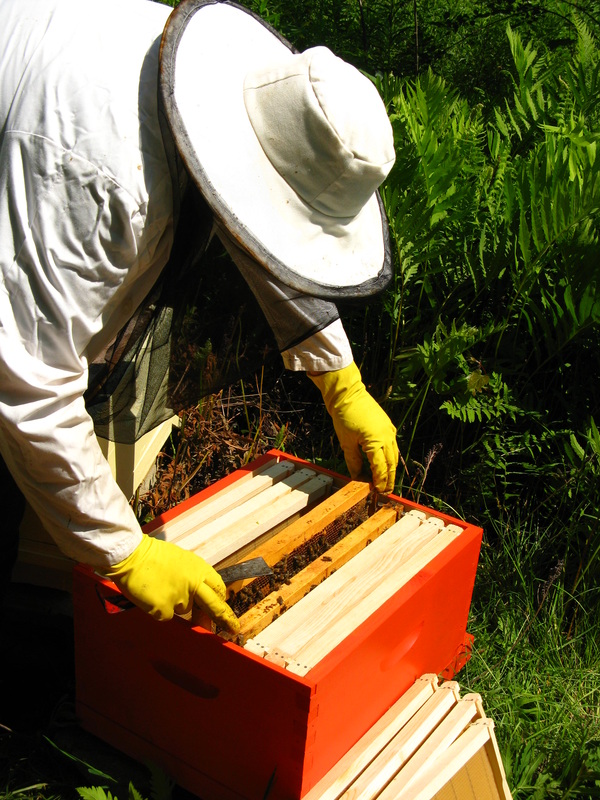   I ate the last can of tuna that I will buy in a long time. I don't really like fish too much to begin with, but I tend to buy canned tuna and eat it occasionally, especially when there isn't much else left in my fridge.
I've heard recently that the Bluefin Tuna is labelled critically endangered by the IUCN. The WWF estimates that the species is in danger of complete collapse. I thought at first that this was used in canned tuna, but I learned that actually, 40% of bluefin is used for sushi in Japan. I looked on the website of the type of tuna I bought, Starkist, but nothing on the label or the website indicated what kind of tuna it was, where it was from, or how it was caught. Whether eating fish is considered sustainable or not really depends on these factors. The Monteray Aquarium Seafood Watch puts out a great guide to what should be avoided, and what types of fish/fishing practices are okay to eat. They also have one about sustainable sushi, for you sushi lovers! Upon further inspection, I found out that most canned tuna in the US/Canada isn't Bluefin Tuna (phew! I haven't been eating an almost-endangered species for years). It comes from Albacore Tuna, which is more plentiful. However, there are many different ways it can be caught, and some areas are worse than others to fish from. The best choice is to get albacore that has been fished from the US/Canada Pacific by pole-and-line. Since I can't find out about where the Starkist tuna that I had for supper came from, I guess I'll just have to assume that I should avoid it. Long-line tuna caught is the worst (compared to trawl and pole-and-line), not only because it catches the bigger fish which have accumulated more mercury, but because there's also a lot of bycatch. So I think I've made the right choice here: less mercury in my body, and less dead marine mammals, turtles, and other fish and invertebrates. I know it's important to eat at least a little fish, since it has omega 3 fatty acid, which humans can't produce on their own. Apparently you can also get omega 3 fatty acids from flaxeed oil and algal oil. I eat fish only occasionally, but I'll replace my canned tuna with a more sustainable choice (of a species and fishing method that is easily identified on the package) or by eating more flaxseed oil. At least until Starkist will tell me what kind of tuna I just ate. I'm so proud of my students today! Last fall, a few students built a worm compost bin for the Montreal Campus of Champlain College of Vermont. It was part of their activism project that I require for students in my environmental science course. By the end of the fall semester, they had built a compost bin out of two big rubbermaid containers and created two beautiful color posters to explain what should be composted and as how to take care of the bin. During the spring semester, another student acquired worms and diligently maintained the compost each week. I was really impressed by his commitment to it - he came to the campus every day to spritz water into the bin, and feed the worms vegetable scraps that another student collected. He even spent hours (literally, hours) sifting through the compost to separate tiny pieces of styrofoam that we acidentally dumped into the bin from a dead potted plant. (That was all my fault, it was my idea). The vermi-compost bin has been plugging away for months now, slowly eating many pounds of food that would have otherwise been tossed into a landfill.
However, there isn't really that much food that is thrown out on campus, due to its small size. Today, my coworker Stefi helped me bring the compost bin to Dans La Rue, a local non-profit, serving homeless and at risk youth. In addition to their large kitchen, part of the services that Dans La Rue offers is a daily job program. One of the aspects of this program is a gardening project that runs in conjunction with the residents of a low-cost housing project. I'm so proud that my students came up with an idea, saw it through to the end, and passed it on to others! Not only is this beneficial to the environment by regenerating soil from organic material that would have otherwise gone to the landfill, but the students worked as a team to create a service project that will help develop other organizations in the Montreal community. I have to admit that I was a little sad to see the worms go to their new home today, since I've realized that I have become emotionally attached to them (not just the individual worms, but the project in general). :) But more than that, I'm really happy that my students used what they learned in class to make a small part of Montreal better. |
About ShonaI'm an eco-conscious girl from Montreal, Quebec. I'm currently an adjunct science professor at Champlain College of Vermont (Montreal Campus). I'm interested in any opportunities to expand my experience with grassroots activism, climate change legislation, or environmental education.  Hiking on Fox Glacier in
New Zealand Archives
March 2016
Categories
All
|
 RSS Feed
